After the AI Tour held in major European cities, where Microsoft presented some novelties, today I want to show you how to develop an agent using Agent Builder.
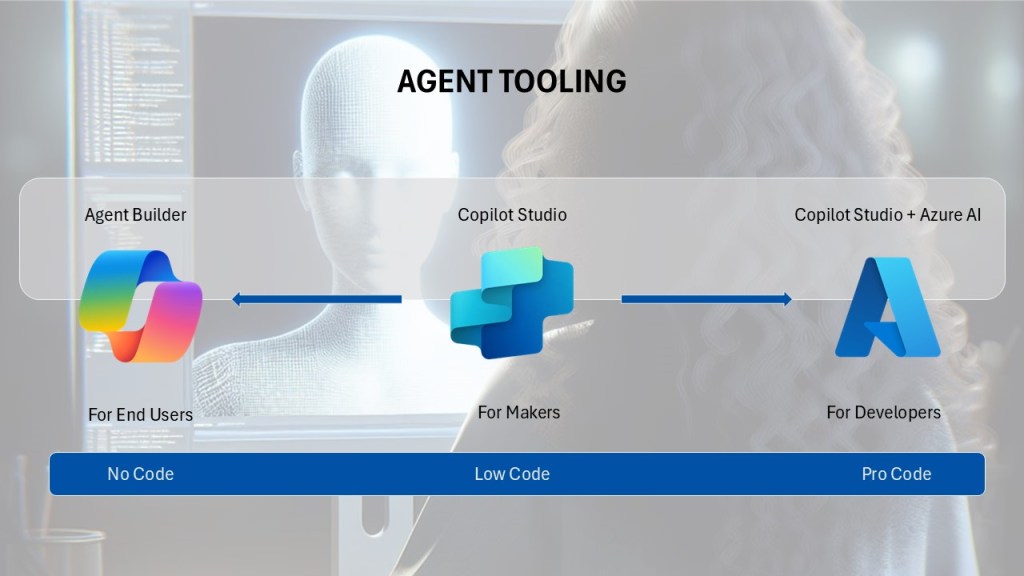
We know how much the Redmond company is pushing for this tool and everything that is the Low-Code / No-Code world. In fact, to create our agents, we have several programming modes.
We go from Agent Builder, where programming knowledge is zero and the direction is to give an ideal tool for the End User, to Copilot Studio, arriving at Copilot Studio + Azure AI, dedicated to more experienced developers.
Each of these modes has distinctive characteristics.
I decide to use Agent Builder.
By accessing the link
I find myself on the Copilot home page and from here I can choose between Work and Web (I can also access from Teams).
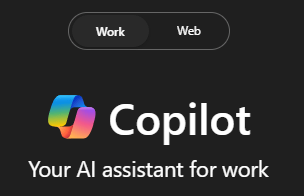
After selecting Work, an interface appears on the right.

We click on “Create agents” to open the development tool.

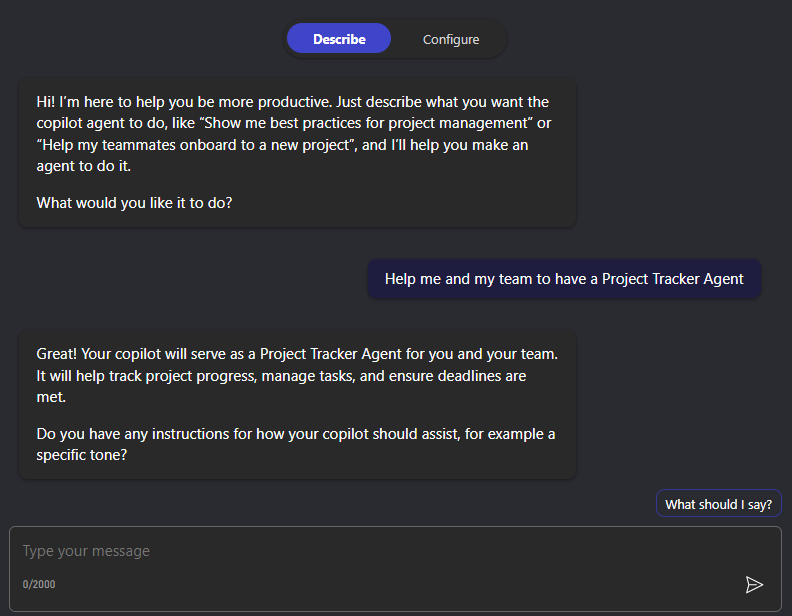
As you can see, the screen is divided into 2 sections. On the left the development part, on the right (once you start developing) our Agent.
Description and Configuration:
Let’s imagine this screen as a development wizard where we are assisted by Copilot asking us for information to create the agent. I then insert the following prompt
“Help me and my team to have a Project Tracker Agent”
Copilot responds by asking me for more information.
I enter “Respond politely. The tone should be friendly and proactive.”
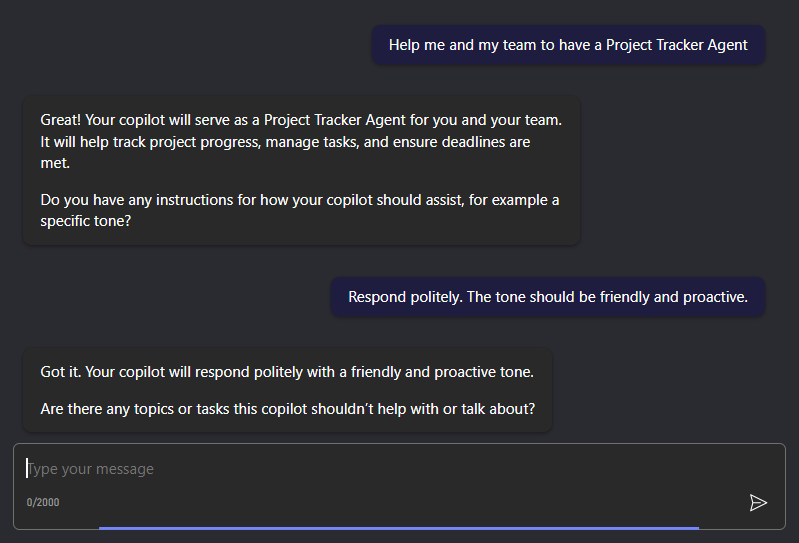
Now comes the fun part. Yes, because Copilot not only asks me what I want and how I want it but also if there are topics or tasks in which it should NOT act or should NOT talk about.
In this specific case, I do not want to give users the possibility to escalate to a Human Agent.
“I don’t want there to be any chance of escalation to a human agent.”
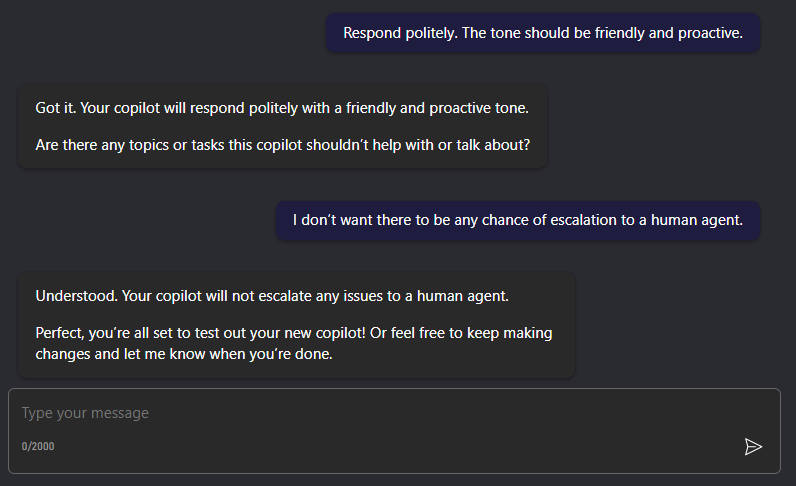
Our agent is therefore ready,
I could also do something more. By clicking on Configure, I have the possibility to access another screen, less discursive, where I can insert the Knowledge (the knowledge that my agent will draw from). Uploading documents of different types allows us to give an even more precise context.
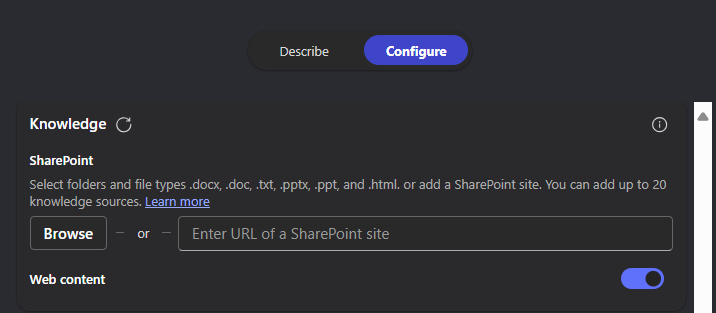
I previously created an analysis document and deposited it in a SharePoint folder, which I will now upload to the agent’s Knowledge.
We did it!
Our agent is ready. I click Create and wait.
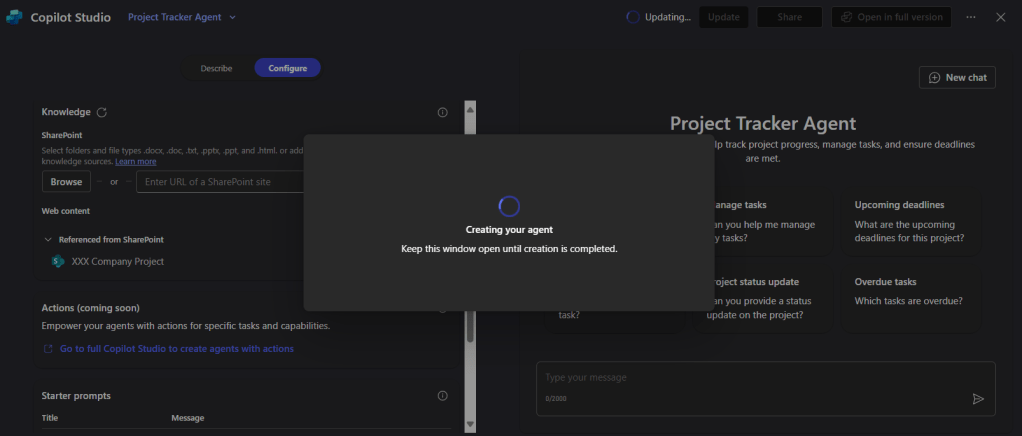
At the top right we find our new agent. Ready to use!

Considerations:
Microsoft is certainly trying to diversify end users for the same product from different interfaces and similar technologies. It seems like a strange concept but a user without experience who wants to create an agent can go from “No-code”, to having a certain type of result, and gradually move towards “Low-Code” and “Pro-Code”.
What do you think of these new tools?
Have you already tried Agent Builder?

Leave a comment